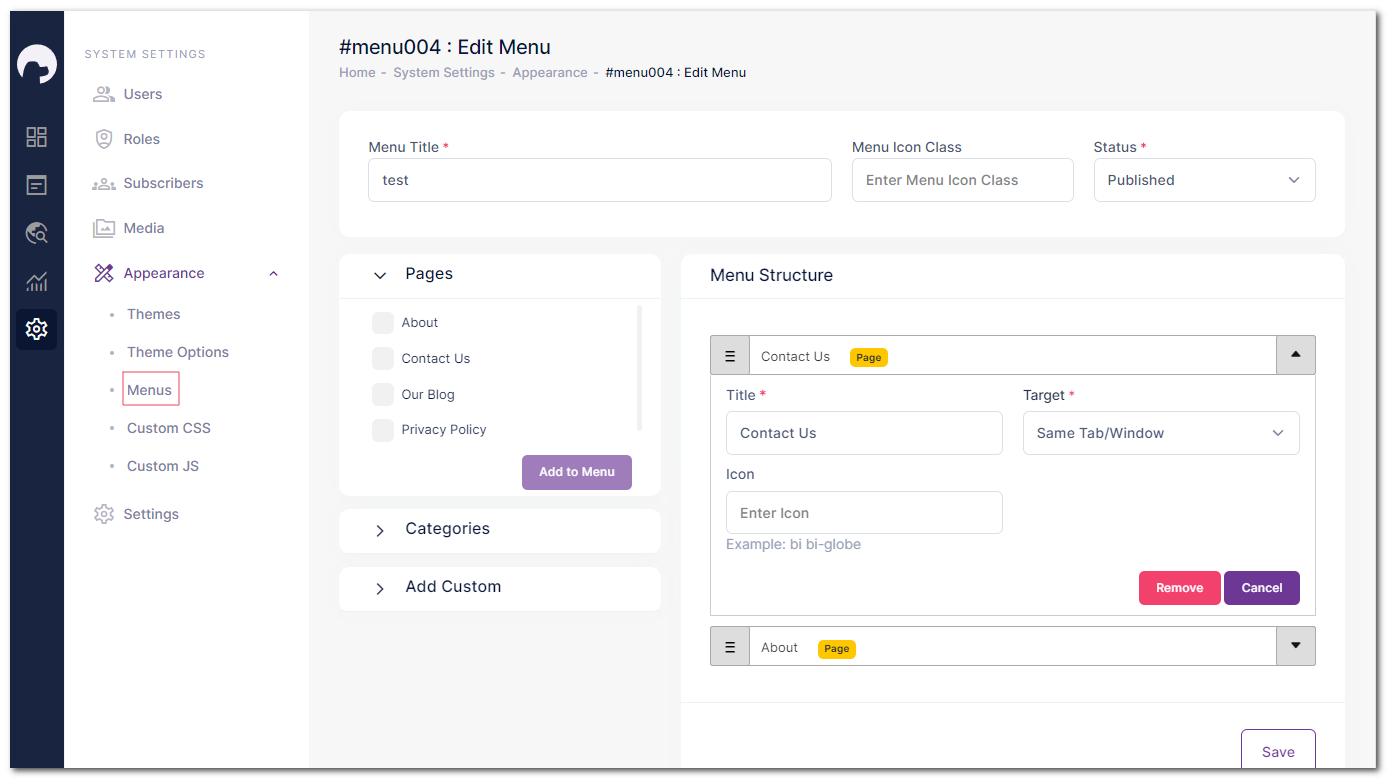
Step 1: Go to "System Settings" on the left-side menu, then select "Appearance" and click on "Menus."
Step 2: Create a new menu by clicking the "Create New Menu" button.
Step 3: Enter the title of the menu and use the drag & drop system to add pages, categories, or custom links according to your preferences.
Step 4: For each menu item, you can specify the target, whether it opens in a new window or the same window.
Step 5: Save your menu after customizing it to your liking.

Step 6: Now, you can choose where to display the menu - in the header or footer.
To add the menu to the header:
Go to "System Settings" and click on "Appearance."
Under "Theme Options," select "Layout," then choose "Header."
In the "Header Navigations" section, choose the menu you created from the dropdown.
To add the menu to the footer:
Follow the same steps as above but select "Footer" under "Layout"
In the "Footer Navigations" section, choose the menu you want to display in the footer.
Customize your menus and place them in the header or footer for an easy-to-use website navigation.
